Prepare to embark on a culinary journey that combines the rich flavors of cheese and garlic with the comforting warmth of bread in our guide to creating the ultimate "Cheesy Garlic Breadsticks." we're dedicated to elevating your culinary skills, and in this comprehensive guide, we'll walk you through the art of crafting these mouthwatering breadsticks that are perfect for sharing or indulging in on your own. Get ready to impress your family and friends with your homemade cheesy garlic breadstick expertise!
Ingredients for Cheesy Garlic Bliss
Before we dive into the delicious process of making cheesy garlic breadsticks, gather these essential ingredients:
For the Dough
- 2 1/4 teaspoons active dry yeast
- 1 teaspoon granulated sugar
- 1 cup warm water (110°F or 43°C)
- 2 1/2 cups all-purpose flour
- 2 tablespoons olive oil
- 1 teaspoon salt
For the Garlic Butter Topping
- 1/2 cup unsalted butter, melted
- 3 cloves garlic, minced
- 2 tablespoons fresh parsley, chopped
- 1/2 teaspoon salt
For the Cheesy Finish
- 1 1/2 cups shredded mozzarella cheese
- 1/4 cup grated Parmesan cheese
- Crafting the Perfect Cheesy Garlic Breadsticks
- Creating these irresistible breadsticks is a delightful endeavor. Let's get started:
Preparing the Dough
- Activate the Yeast: In a small bowl, combine the active dry yeast, granulated sugar, and warm water. Stir gently and let it sit for about 5-10 minutes, or until it becomes frothy.
- Mix the Dough: In a large mixing bowl, combine the all-purpose flour, olive oil, and salt. Pour in the activated yeast mixture. Mix until a soft dough forms.
- Knead the Dough: Turn the dough onto a floured surface and knead it for about 3-5 minutes, or until it's smooth and elastic.
- Let It Rise: Place the dough in a lightly greased bowl, cover it with a clean kitchen towel, and let it rise in a warm, draft-free place for about 1 hour, or until it has doubled in size.
Shaping and Baking
- Preheat the Oven: Preheat your oven to 425°F (220°C).
- Roll Out the Dough: Roll out the dough into a rectangle on a floured surface, about 12x18 inches in size.
- Prepare the Topping: In a small bowl, mix together the melted unsalted butter, minced garlic, chopped fresh parsley, and salt.
- Brush with Garlic Butter: Brush the garlic butter mixture generously over the entire surface of the dough.
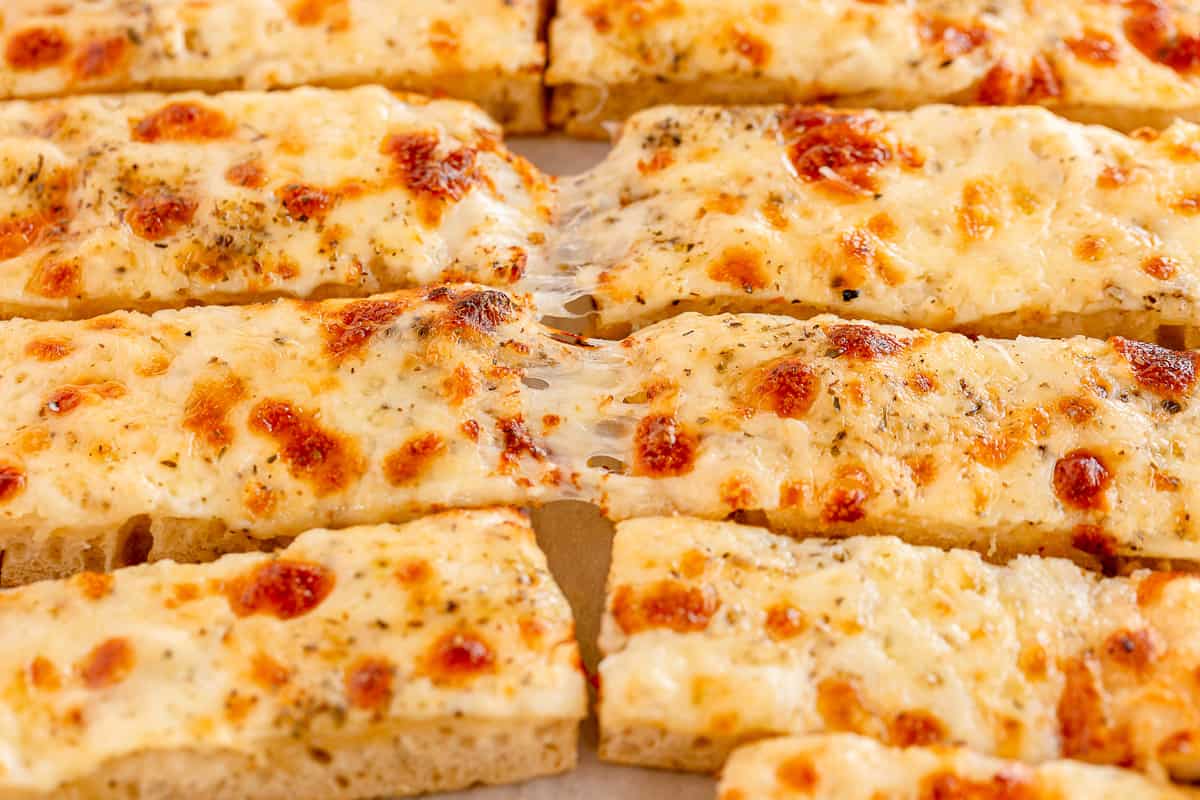
- Add the Cheeses: Sprinkle the shredded mozzarella and grated Parmesan evenly over the garlic butter-covered dough.
- Cut into Strips: Using a pizza cutter or a sharp knife, cut the dough into strips, about 1 1/2 inches wide.
- Twist the Strips: Carefully twist each strip and place it on a parchment-lined baking sheet.
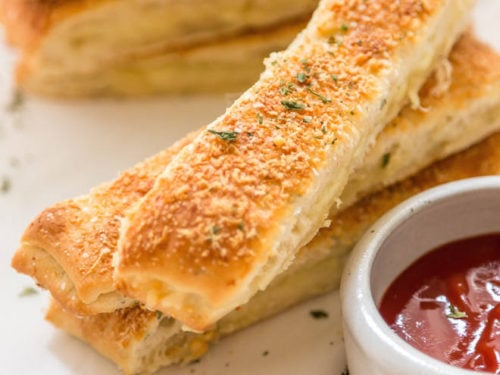
- Bake to Perfection: Bake in the preheated oven for about 12-15 minutes, or until the breadsticks are golden brown and the cheese is bubbly and slightly crispy.
Savoring the Savory Goodness
As you take your first bite into a cheesy garlic breadstick, savor the delightful combination of soft, aromatic bread, the richness of melted cheese, and the comforting notes of garlic and parsley. Each bite is a culinary masterpiece that will surely have you reaching for seconds.
Frequently Asked Questions (FAQs)
1. Can I use pre-made pizza dough for this recipe?
Absolutely! You can save time by using pre-made pizza dough from your local grocery store.
2. Can I customize the cheese selection?
Of course! Feel free to experiment with different cheeses like cheddar, provolone, or even a blend of your favorites.
3. How do I store leftover cheesy garlic breadsticks?
Store any leftover breadsticks in an airtight container in the refrigerator. Reheat in the oven or microwave before enjoying.
Homemade Delight
As you savor the last bite of your cheesy garlic breadstick, relish the satisfaction of creating a savory masterpiece that's perfect for any occasion. You've just embarked on a culinary journey that combines simplicity with delectable flavors, leaving a trail of happy taste buds in its wake.
If you're eager to explore more culinary adventures and discover ways to elevate your cooking skills, visit our website for further inspiration. Remember, every creation you make is an opportunity to share joy through the magic of food.
No comments:
Post a Comment