Thursday 6 June 2024

Pulled Pork Recipes

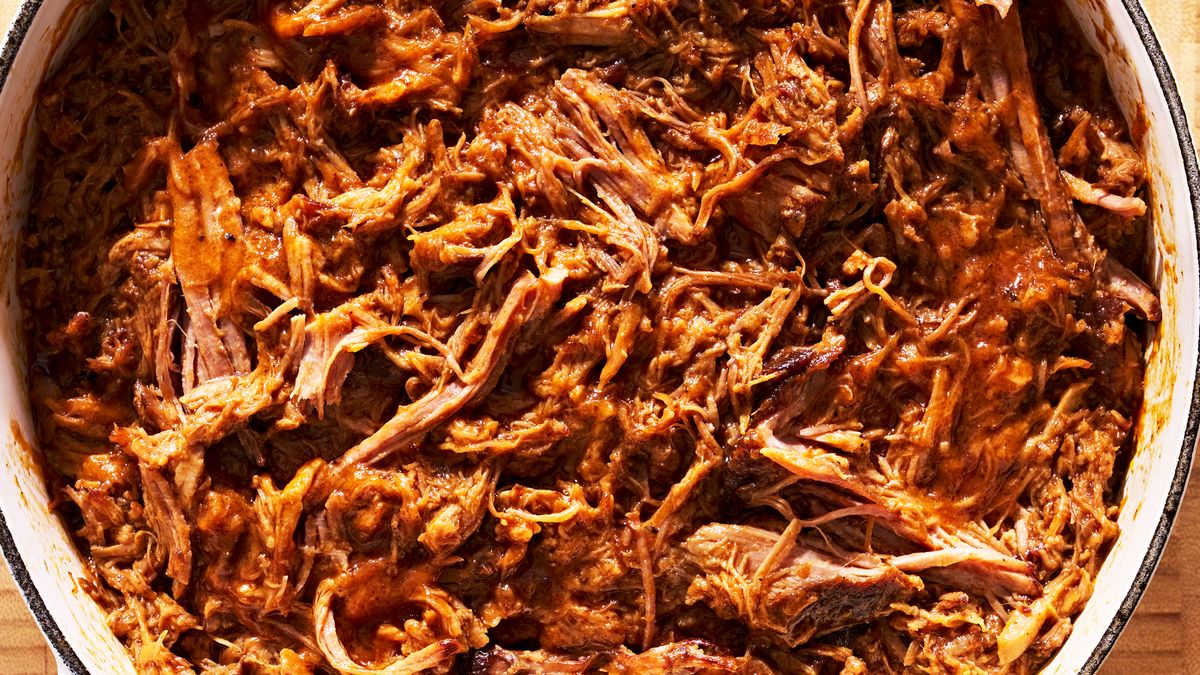
Pulled Pork


Pulled pork is a beloved dish known for its tender, flavorful meat that practically melts in your mouth. It's a staple at barbecues and family gatherings, celebrated for its versatility and ability to pair with a wide range of sides and sauces. In this article, we'll delve into everything you need to know about making the perfect pulled pork, from selecting the right cut of meat to mastering various cooking methods.


What is Pulled Pork?

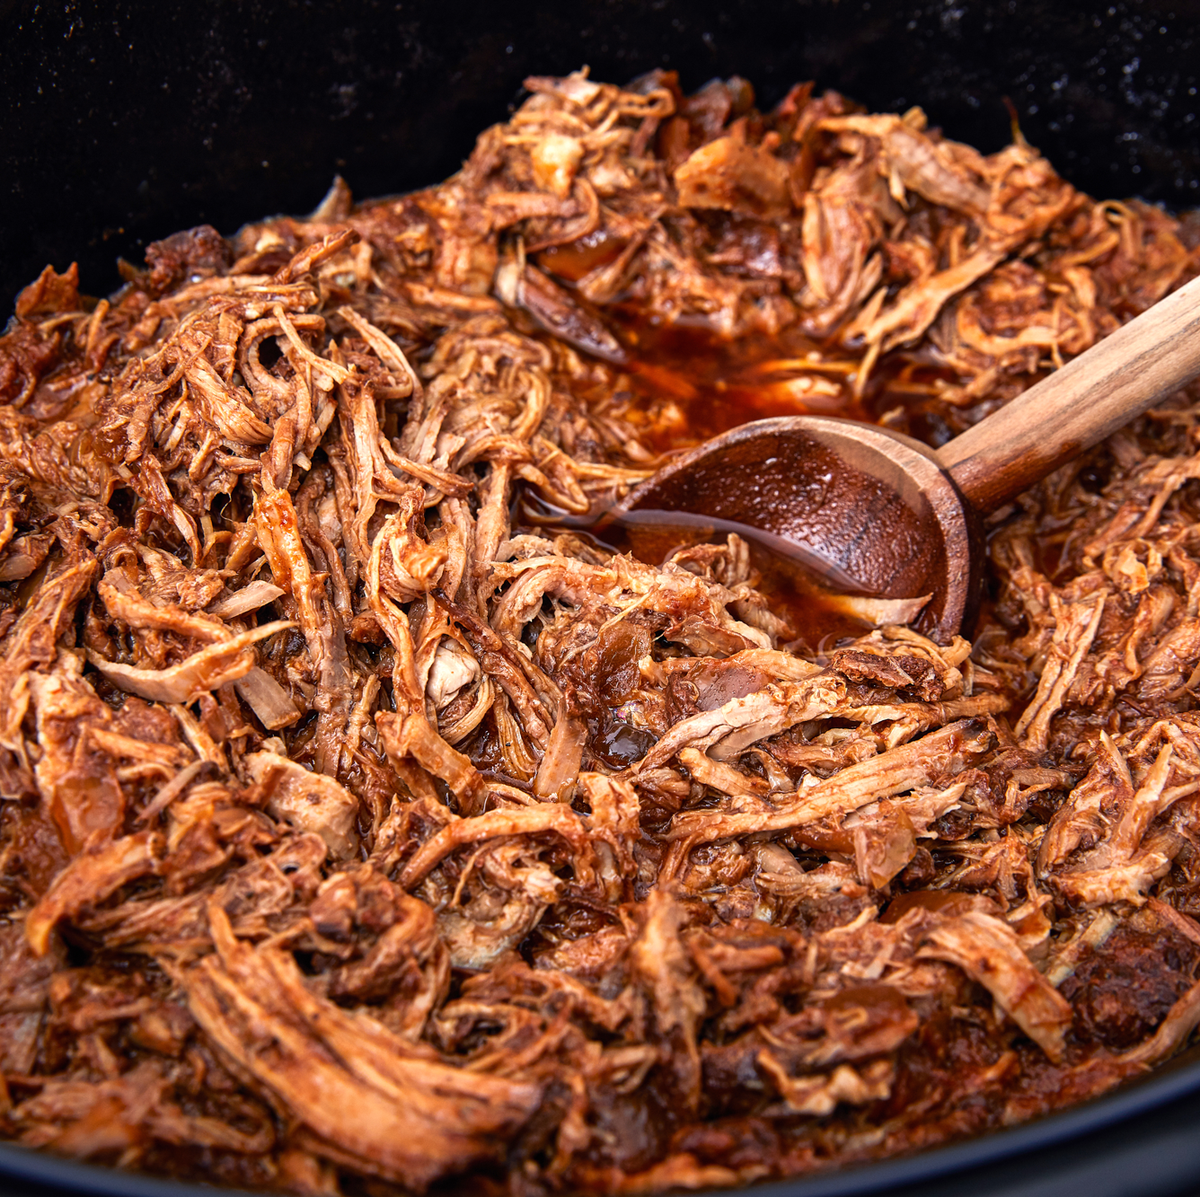
Pulled pork is a method of cooking pork, typically shoulder or butt, until it is so tender that it can be easily "pulled" or shredded into pieces. The meat is usually slow-cooked, allowing the flavors to develop deeply and the meat to become incredibly juicy and flavorful. 


History of Pulled Pork

Pulled pork has its origins in the southeastern United States, particularly in the Carolinas, where barbecuing meat over a pit was a longstanding tradition. Over time, different regions have developed their own unique styles and techniques, from the vinegar-based sauces of North Carolina to the tomato-based sauces of Kansas City.


Ingredients Needed

To make mouth-watering pulled pork, you'll need:

Essential Ingredients:

  • Pork Shoulder or Butt: The best cut for pulled pork due to its fat content and flavor.
  • Dry Rub: A mix of spices like paprika, garlic powder, onion powder, and brown sugar.
  • BBQ Sauce: Homemade or store-bought, to add during cooking or serving.


Optional Ingredients:

  • Apple cider vinegar or apple juice for braising
  • Mustard for a tangy flavor
  • Liquid smoke for a smoky taste


Choosing the Right Cut of Pork

The key to great pulled pork lies in choosing the right cut of meat. The most popular cuts are:

Pork Shoulder: Also known as pork butt or Boston butt, this cut is marbled with fat, which renders down during cooking, keeping the meat juicy and flavorful.

Pork Picnic: Another cut from the shoulder, it has a bit more bone and connective tissue but is still excellent for pulled pork.


Look for meat with a good balance of meat and fat, as the fat will keep the pork moist during the long cooking process.


Preparing the Pork

Proper preparation is crucial for tender, flavorful pulled pork:

1. Trimming and Seasoning: Trim excess fat from the pork, but leave some to keep the meat moist. Season generously with your dry rub, making sure to cover all sides.

2. Marination Options: For extra flavor, marinate the pork in a mixture of apple cider vinegar, apple juice, and spices for a few hours or overnight.


Making the Dry Rub

A flavorful dry rub is essential for great pulled pork. Here's a basic recipe:

Ingredients:

  • 1/4 cup brown sugar
  • 1/4 cup paprika
  • 1 tablespoon black pepper
  • 1 tablespoon salt
  • 1 tablespoon chili powder
  • 1 tablespoon garlic powder
  • 1 tablespoon onion powder
  • 1 teaspoon cayenne pepper (optional for heat)


Applying the Rub:

Rub the mixture all over the pork, making sure to coat it thoroughly. Let it sit for at least 30 minutes to allow the flavors to penetrate the meat.

Pulled Pork


Cooking Methods

Pulled pork can be cooked using various methods, each bringing out different flavors and textures:

Slow Cooker Instructions:

1. Place the seasoned pork in the slow cooker.

2. Add a small amount of liquid (apple cider vinegar, apple juice, or broth) to the cooker.

3. Cook on low for 8-10 hours or on high for 4-6 hours, until the meat is tender and easily shredded.


Oven Instructions:

1. Preheat the oven to 300°F (150°C).

2. Place the pork in a roasting pan and add a small amount of liquid.

3. Cover tightly with foil and bake for 3-4 hours, or until the meat is tender.

4. Uncover and cook for an additional 1-2 hours to allow the outside to brown.


Smoker Instructions:

1. Preheat your smoker to 225°F (107°C).

2. Place the pork on the smoker rack and smoke for 4-5 hours, until it reaches an internal temperature of 195°F (90°C).

3. Wrap in foil and cook for an additional 1-2 hours.


Achieving the Perfect Texture

The secret to perfect pulled pork is cooking it low and slow:

Low and Slow Cooking: Cooking at a low temperature for a long time allows the connective tissues to break down, resulting in tender meat.

Resting the Pork: After cooking, let the pork rest for 15-20 minutes before shredding to allow the juices to redistribute.


Shredding the Pork

Shredding the pork properly ensures even texture and flavor distribution:

1. Use two forks to pull the meat apart into shreds.

2. Alternatively, use meat claws or your hands (with gloves) for faster shredding.

3. Mix the shredded pork with any remaining juices from the cooking process.


Serving Suggestions

Pulled pork is incredibly versatile and can be served in many ways:

Classic Sides:

  • Coleslaw
  • Baked beans
  • Cornbread
  • Potato salad


Creative Serving Ideas:

Tacos: Serve pulled pork in soft tortillas with fresh salsa and guacamole.

Sliders: Pile the pork on small buns with coleslaw and pickles.

Nachos: Layer pulled pork over tortilla chips with cheese, jalapeƱos, and sour cream.


Health Benefits of Pulled Pork

While pulled pork is often considered indulgent, it can be part of a balanced diet:

Protein: Pork is a great source of protein, essential for muscle repair and growth.

Vitamins and Minerals: Pork provides important nutrients like B vitamins, iron, and zinc.

Healthier Options: Use lean cuts of pork, reduce added sugars in the sauce, and pair with healthy sides.


Popular Variations

Pulled pork can be customized to fit different regional styles and flavor preferences:

Carolina-Style Pulled Pork:

Uses a vinegar-based sauce with a tangy and slightly spicy flavor.


Texas-Style Pulled Pork:

Features a simple dry rub and is often served with a tomato-based BBQ sauce.


Asian-Inspired Pulled Pork:

Marinated in soy sauce, ginger, garlic, and hoisin sauce for a savory and slightly sweet flavor.


Tips and Tricks for the Best Pulled Pork


Ensure your pulled pork is always a hit with these tips:

Avoid Overcooking: Monitor the internal temperature to avoid drying out the meat.

Use a Meat Thermometer: Cook to an internal temperature of 195-205°F (90-96°C) for perfect tenderness.

Keep Moist: Add a bit of liquid during cooking and cover tightly to retain moisture.


Cultural Significance

Pulled pork plays a significant role in American BBQ culture, symbolizing community, celebration, and culinary tradition. It has also inspired

 global adaptations, with each culture adding its unique flavors and cooking methods.


Conclusion

Pulled pork is a versatile and flavorful dish that can be enjoyed in countless ways. Whether you're slow cooking, baking, or smoking, mastering the art of pulled pork will elevate your culinary skills and delight your taste buds. Experiment with different techniques and recipes to find your perfect pulled pork preparation and enjoy the delicious results.


FAQs

Can I make pulled pork ahead of time?

Yes, you can prepare the pulled pork ahead of time and refrigerate it. Reheat gently to maintain tenderness.


How do I store leftovers?

Store leftover pulled pork in an airtight container in the refrigerator for up to 3 days. Reheat gently to maintain moisture.


Can I freeze pulled pork?

Yes, you can freeze-cooked pulled pork. Wrap it tightly in foil and place it in a freezer bag. Thaw in the refrigerator before reheating.


What can I substitute for BBQ sauce?

If you don't have BBQ sauce, you can use a mixture of ketchup, brown sugar, vinegar, and spices as a substitute.


How can I make the pulled pork spicier?

To add more heat, include hot sauce in the marinade or dry rub, and sprinkle red pepper flakes on the pork before cooking.
BBQ Ribs Recipe

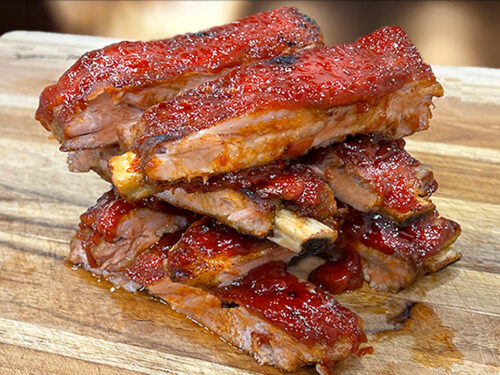
BBQ Ribs


BBQ ribs are a cornerstone of American cuisine, celebrated for their tender, flavorful meat, and smoky, caramelized crust. Whether you're hosting a summer cookout or enjoying a cozy family dinner, BBQ ribs are always a crowd-pleaser. Let's explore the delicious world of BBQ ribs, from their rich history to the best techniques for cooking them to perfection.


What are BBQ Ribs?

BBQ ribs are cuts of meat, typically pork or beef, that are cooked using a low and slow method and smothered in a flavorful barbecue sauce. The two most popular types of ribs are pork ribs, which include baby back ribs, spare ribs, and St. Louis-style ribs, and beef ribs, known for their rich, beefy flavor.


History of BBQ Ribs

The tradition of barbecuing ribs dates back to indigenous peoples who smoked meat over open flames. The technique was perfected in the southern United States, where BBQ became a culinary art form. Different regions developed their own styles, from the sweet, tangy sauces of Kansas City to the dry rubs of Memphis.


Ingredients Needed

To make mouth-watering BBQ ribs, you'll need:

Essential Ingredients:

  • Ribs: Baby back, spare, or St. Louis-style pork ribs, or beef ribs
  • BBQ Sauce: Homemade or store-bought
  • Dry Rub: A mix of spices like paprika, garlic powder, onion powder, and brown sugar


Optional Ingredients:

  • Marinade ingredients such as apple cider vinegar, Worcestershire sauce, and mustard
  • Honey or molasses for a sweeter glaze
  • Hot sauce for added heat


Choosing the Right Ribs

The type of ribs you choose will affect the flavor and texture:

  • Baby Back Ribs: Tender and lean, these ribs come from the upper part of the ribcage.
  • Spare Ribs: Larger and meatier, spare ribs are cut from the belly.
  • St. Louis-Style Ribs: A trimmed version of spare ribs, offering uniform shape and cooking.


Look for ribs with a good amount of meat and a nice layer of fat, which helps keep the meat moist during cooking.


Preparing the Ribs

Proper preparation is key to great BBQ ribs:

1. Cleaning and Trimming: Rinse the ribs and pat them dry. Trim any excess fat.

2. Removing the Membrane: Slide a knife under the membrane on the bone side and peel it off. This helps the ribs cook evenly and absorb flavors better.


Marinating the Ribs

Marinating adds depth of flavor to your ribs:

Ingredients for a Basic Marinade:

  • Apple cider vinegar
  • Worcestershire sauce
  • Mustard
  • Garlic powder
  • Brown sugar


Time Recommendations:

Marinate the ribs for at least 2 hours, but overnight is best for maximum flavor infusion.

Making the BBQ Sauce

A great BBQ sauce can elevate your ribs:

Ingredients:

  • Ketchup or tomato sauce
  • Brown sugar
  • Apple cider vinegar
  • Worcestershire sauce
  • Mustard
  • Spices (paprika, garlic powder, onion powder, black pepper)

BBQ Ribs


Preparation:

1. Combine all ingredients in a saucepan.

2. Simmer over low heat for 20-30 minutes, stirring occasionally.

3. Adjust seasoning to taste.


Dry Rub vs. Marinade

Both dry rubs and marinades add flavor, but in different ways:

  • Dry Rub: A blend of spices rubbed onto the meat before cooking. Creates a flavorful crust.
  • Marinade: A liquid mixture that tenderizes and flavors the meat. Penetrates deeper into the meat.

For the best results, you can use both: marinate the ribs first, then apply a dry rub before cooking.


Cooking Methods

There are several ways to cook BBQ ribs:


Grilling Instructions:

1. Preheat the grill to 225°F (107°C).

2. Place the ribs on the grill, bone side down.

3. Cook for 3-4 hours, basting with BBQ sauce every hour.

4. Wrap the ribs in foil for the last hour to keep them moist.


Oven-Baking Instructions:

1. Preheat the oven to 300°F (150°C).

2. Place the ribs on a baking sheet, bone side down.

3. Cover with foil and bake for 2.5 to 3 hours.

4. Remove the foil, brush with BBQ sauce, and bake for an additional 30 minutes.


Slow Cooker Instructions:

1. Place the ribs in the slow cooker.

2. Pour BBQ sauce over the ribs.

3. Cook on low for 6-8 hours or on high for 4-5 hours.

4. For a crispy finish, broil the ribs in the oven for a few minutes after slow cooking.


Achieving the Perfect Texture

The key to tender ribs is cooking them low and slow:

Low and Slow Cooking: Cook at a low temperature for several hours to break down the connective tissue.

Resting the Ribs: Let the ribs rest for 10-15 minutes after cooking to allow the juices to redistribute.


Basting and Glazing

Basting and glazing add extra flavor and moisture:


Basting: Brush the ribs with BBQ sauce every hour during cooking.

Glazing: Apply a final coat of sauce in the last 10-15 minutes of cooking.


Serving Suggestions

BBQ ribs are best enjoyed with classic sides and refreshing beverages:

Classic Sides:

  • Coleslaw
  • Cornbread
  • Baked beans
  • Macaroni and cheese


Beverage Pairings:

  • Cold beer
  • Iced tea
  • Lemonade


Health Benefits of BBQ Ribs

While BBQ ribs are often seen as indulgent, they can be part of a balanced diet:


  • Protein: Ribs are a good source of protein.
  • Vitamins and Minerals: Ribs provide essential nutrients like iron and zinc.
  • Healthier Options: Use leaner cuts of meat, reduce added sugars in the sauce, and pair with healthy sides.


Popular Variations

BBQ ribs can be customized to fit different regional styles and flavor preferences:

  • Kansas City: Sweet and tangy sauce with a tomato base.
  • Memphis: Dry rub with a vinegar-based mop sauce.
  • Texas: Beef ribs with a peppery dry rub and minimal sauce.
  • Honey Mustard: A sweet and tangy glaze made with honey and mustard.
  • Spicy Korean: A marinade with soy sauce, gochujang, and sesame oil.


Tips and Tricks for the Best BBQ Ribs

Ensure your ribs are always a hit with these


 Tips:

Avoid Boiling: Boiling ribs can make them tough. Stick to slow cooking methods.

Use a Meat Thermometer: Cook ribs to an internal temperature of 190-203°F (88-95°C) for perfect tenderness.

Rest After Cooking: Allow the ribs to rest before cutting to keep them juicy.


Cultural Significance

BBQ ribs play a significant role in American BBQ culture, symbolizing community, celebration, and culinary tradition. They have also inspired global adaptations, with each culture adding its unique flavors and cooking methods.


Conclusion

BBQ ribs are a quintessential part of American cuisine, beloved for their rich flavor and tender texture. Whether you're grilling, baking, or slow cooking, mastering the art of BBQ ribs is sure to make you a star at any gathering. Try out different techniques and recipes to find your perfect rib preparation and enjoy the delicious results.


FAQs

Can I make BBQ ribs ahead of time?

Yes, you can prepare the ribs ahead of time and refrigerate them. Reheat in the oven or on the grill before serving.


How do I store leftovers?

Store leftover ribs in an airtight container in the refrigerator for up to 3 days. Reheat gently to maintain tenderness.


Can I freeze BBQ ribs?

Yes, you can freeze cooked ribs. Wrap them tightly in foil and place them in a freezer bag. Thaw in the refrigerator before reheating.


What can I substitute for BBQ sauce?

If you don't have BBQ sauce, you can use a mixture of ketchup, brown sugar, vinegar, and spices as a substitute.


**How can I make the ribs spicier?**

To add more heat, include hot sauce in the marinade or dry rub, and sprinkle red pepper flakes on the ribs before cooking.


Saturday 1 June 2024

Buffalo chicken dip Recipe

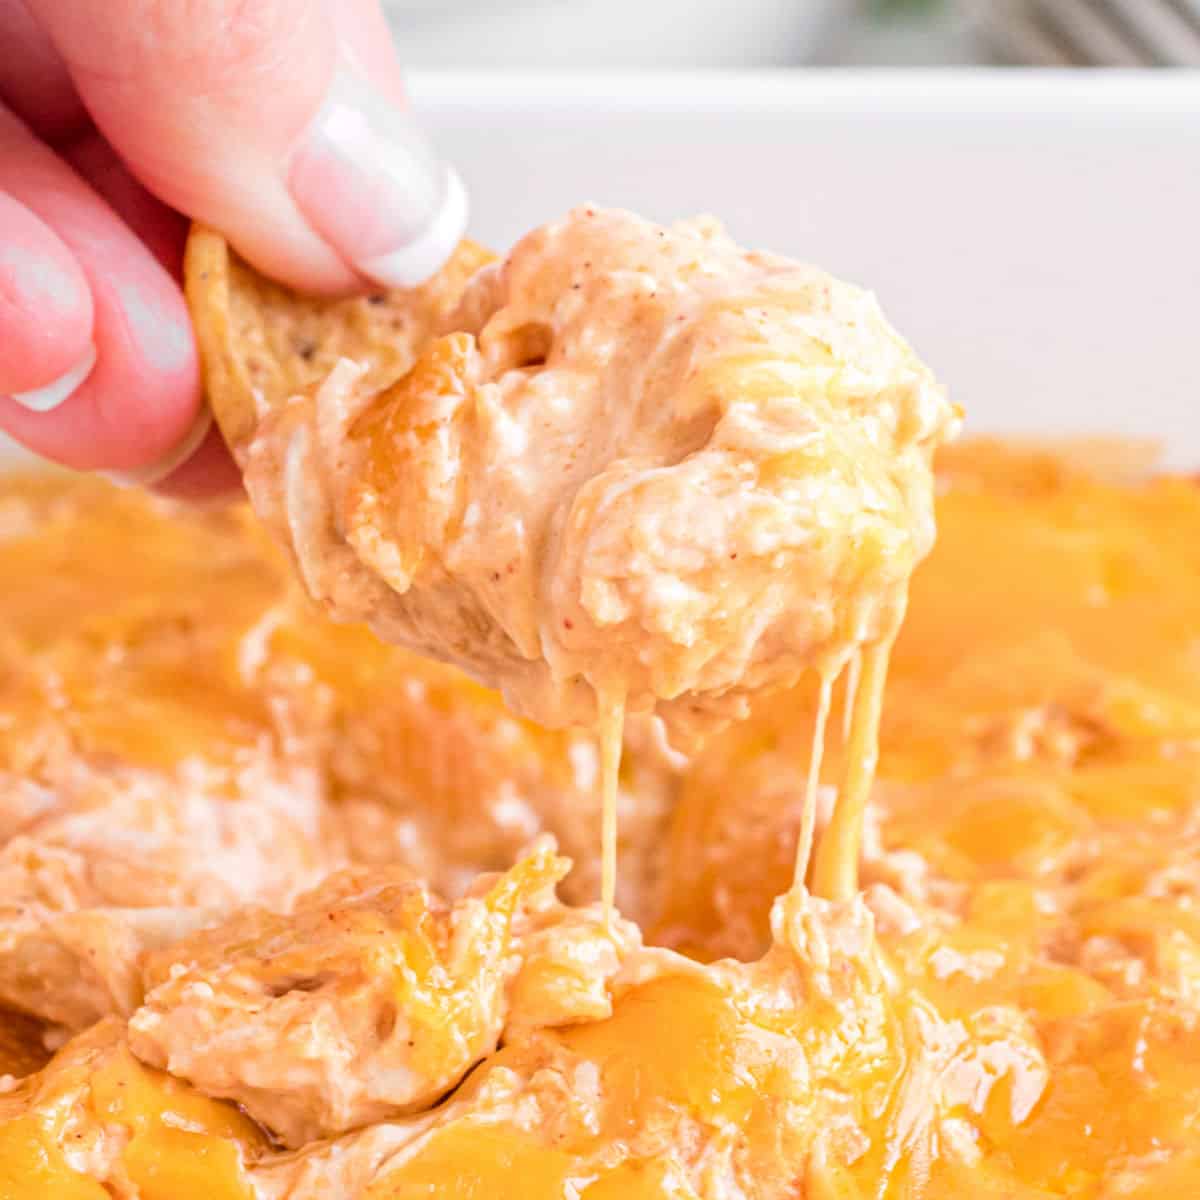
Buffalo chicken dip is a deliciously creamy and spicy appetizer that has become a staple at parties, game day gatherings, and casual get-togethers. This dip combines the bold flavors of buffalo sauce with tender chicken and a creamy, cheesy base, creating a crowd-pleasing dish that's hard to resist.


Ingredients

Let's start with the essentials you'll need to create this flavorful dip.

Essential Ingredients:

  • 2 cups of shredded cooked chicken
  • 8 oz of cream cheese, softened
  • 1/2 cup of buffalo sauce (such as Frank’s RedHot)
  • 1/2 cup of ranch dressing or blue cheese dressing
  • 1 cup of shredded cheddar cheese
  • 1/2 cup of shredded mozzarella cheese


Optional Additions:

  • 1/4 cup of chopped green onions for garnish
  • Crumbled blue cheese for extra flavor
  • A splash of Worcestershire sauce for depth
  • Chopped celery for added crunch


Preparation

Proper preparation ensures a smooth cooking process and a tasty result.

Pre-Cooking Steps:

1. Cook the Chicken: You can use rotisserie chicken for convenience or cook chicken breasts and shred them.

2. Soften the Cream Cheese: Let the cream cheese sit at room temperature until it’s soft and easy to mix.


Shredding the Chicken:

  • Use two forks to pull apart the cooked chicken into bite-sized pieces.
  • Ensure the chicken is well-shredded for a consistent texture in the dip.


Mixing the Dip

Combining the ingredients correctly is key to achieving the perfect buffalo chicken dip.


Combining the Ingredients:


1. Mix the Cream Cheese: In a large bowl, mix the softened cream cheese until smooth.

2. Add the Sauces: Stir in the buffalo sauce and ranch or blue cheese dressing until well combined.

3. Incorporate the Chicken: Fold in the shredded chicken, ensuring it's evenly distributed.

4. Add the Cheese: Mix in the shredded cheddar and mozzarella cheese.


Achieving the Right Consistency:

  • The dip should be creamy and thick. Adjust with more dressing or buffalo sauce if needed.
  • Taste the mixture and add more buffalo sauce if you prefer a spicier dip.


Cooking Methods

You have a couple of options for cooking the dip, depending on your preference and available equipment.


Oven-Baked Dip:

1. Preheat the Oven: Set the oven to 350°F (175°C).

2. Transfer to Baking Dish: Spread the mixture evenly in an oven-safe dish.

3. Bake: Bake for 20-25 minutes until the dip is bubbly and slightly browned on top.

4. Garnish: Sprinkle with chopped green onions or crumbled blue cheese if desired.


Slow Cooker Method:

1. Combine Ingredients: Mix all ingredients in a slow cooker.

2. Cook: Set the slow cooker to low and cook for 2-3 hours, stirring occasionally.

3. Serve Warm: Keep the slow cooker in the warm setting for serving.


Serving Suggestions

Choosing the right diapers and presentation can elevate your buffalo chicken dip experience.


Best Dippers to Use:


  • Tortilla Chips: Classic and sturdy enough to hold the dip.
  • Celery Sticks: Adds a refreshing crunch.
  • Carrot Sticks: Another healthy option.
  • Crackers: Use a variety of crackers for different textures.


Plating Ideas:

  • Serve in a large, shallow bowl for easy dipping.
  • Garnish with green onions and crumbled blue cheese for a pop of color and flavor.
  • Place diapers around the dip in a circular pattern for an appealing presentation.


Variations of Buffalo Chicken Dip

Buffalo chicken dip can be adapted to suit different tastes and dietary preferences.


Spicy Buffalo Chicken Dip: Add extra hot sauce or diced jalapeƱos.

Cheesy Buffalo Chicken Dip: Mix in extra cheddar or pepper jack cheese.

BBQ Buffalo Chicken Dip: Substitute half of the buffalo sauce with your favorite BBQ sauce for a unique twist.


Healthier Alternatives

Making a healthier version of buffalo chicken dip is possible with a few substitutions.


Lower Calorie Options:

Greek Yogurt: Replace the cream cheese with Greek yogurt for a lighter option.

Light Cheese: Use reduced-fat cheeses to cut down on calories.

Lean Protein: Use skinless chicken breast for a leaner dip.


Dairy-Free Substitutes:


Vegan Cream Cheese: Use a plant-based cream cheese alternative.

Dairy-Free Cheese: Substitute with dairy-free shredded cheese.

Coconut Milk: Use coconut milk as a creamy base instead of dairy.


Common Mistakes to Avoid

Here are some tips to ensure your buffalo chicken dip turns out perfectly every time.


  • Overcooking: Avoid baking the dip too long to prevent it from drying out.
  • Underseasoning: Taste the mixture before baking and adjust the seasoning if needed.
  • Using Cold Ingredients: Make sure all ingredients are at room temperature for easier mixing.


Storage and Reheating Tips

Buffalo chicken dip can be made ahead and stored for future enjoyment.


Best Practices for Leftovers:


Refrigeration: Store in an airtight container in the refrigerator for up to 3 days.

Freezing: You can freeze the dip for up to 3 months. Thaw overnight in the refrigerator before reheating.


Reheating Tips:


Oven: Reheat in the oven at 350°F (175°C) until warmed through.

Microwave: Heat individual portions in the microwave, stirring occasionally to ensure even heating.


Frequently Asked Questions


1. Can I make buffalo chicken dip ahead of time?

   Yes, you can prepare the dip a day in advance and bake it just before serving.

2. What can I use instead of buffalo sauce?

   You can use any hot sauce you prefer, adjusting the quantity to taste.

3. Can I use canned chicken for this dip?

   Yes, canned chicken works as a convenient alternative to fresh chicken.

4. How can I make my dip extra creamy?

   Add a bit more cream cheese or a splash of milk to achieve a creamier texture.

5. What if my dip is too spicy?

   Mix in more cream cheese or ranch dressing to balance the heat.


Conclusion

Buffalo chicken dip is a versatile and flavorful appetizer that's sure to be a hit at any gathering. With a few simple ingredients and easy preparation, you can whip up a delicious dip that will leave your guests asking for more. Whether you stick to the classic recipe or try out different variations, this dip is guaranteed to satisfy your cravings. So, gather your ingredients and give this recipe a try – you won't be disappointed!


I hope you are having a wonderful day! I have a small favor to ask. I'm aiming to rank in the top 10 on the ChatGPT store, and I can't do it without your amazing support. Could you please use my GPT [https://bit.ly/GPT_Store] and leave some feedback? Your positive reviews would mean the world to me and help me achieve my goal. Additionally, please bookmark my GPT for easy access in the future.

Thank you so much for your kindness and support!

Warm regards

Chicken Fried Rice Recipe

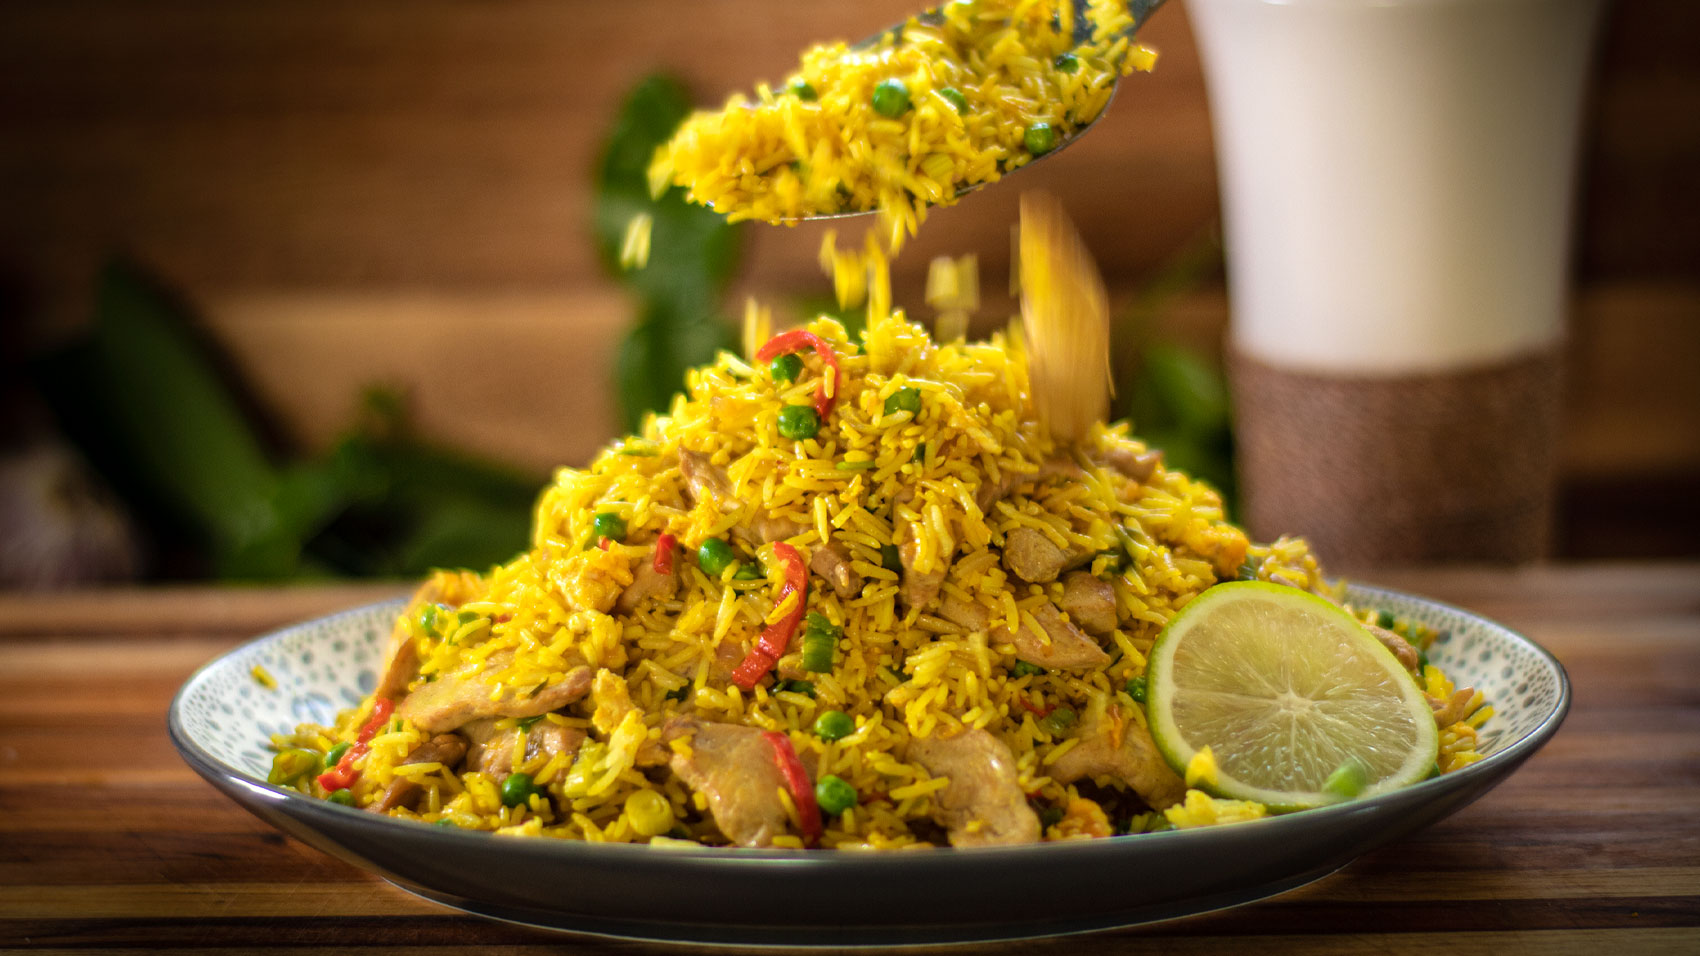
Chicken fried rice is a classic dish that combines the comforting elements of fluffy rice, tender chicken, and a medley of vegetables, all brought together with savory seasonings. Whether you're a seasoned home cook or a beginner in the kitchen, mastering the art of chicken fried rice is a valuable skill that can turn a simple meal into a delightful culinary experience.


Chicken Fried Rice Recipe


Ingredients

Before diving into the cooking process, let's gather the essential ingredients. Here's what you'll need:


Essential Ingredients:

  • 2 cups of cooked jasmine rice (preferably day-old)
  • 1 lb of chicken breast, diced
  • 2 tablespoons of vegetable oil
  • 1 medium onion, finely chopped
  • 2 cloves of garlic, minced
  • 2 eggs, beaten
  • 1 cup of mixed vegetables (peas, carrots, corn)
  • 3 tablespoons of soy sauce
  • 1 tablespoon of oyster sauce
  • 1 teaspoon of sesame oil
  • Salt and pepper to taste


Optional Additions:

  • Sliced green onions for garnish
  • Chopped cilantro for a fresh touch
  • Red pepper flakes for a spicy kick
  • A splash of fish sauce for extra umami


Preparation

Proper preparation is key to making chicken fried rice that’s bursting with flavor and perfectly textured.

Pre-Cooking Steps:

1. Cook the Rice: If you haven't already, cook the rice according to the package instructions and let it cool. Using day-old rice is ideal as it’s less sticky and fries better.

2. Prep the Vegetables: Chop your vegetables and set them aside.

3. Marinate the Chicken: Marinate the diced chicken with a bit of soy sauce, salt, and pepper for at least 15 minutes.


Cooking the Rice

Chicken Fried Rice Recipe


Choosing the right type of rice and cooking it properly is crucial.


Choosing the Right Type of Rice:

  • Jasmine rice is recommended for its fragrance and texture.
  • Make sure the rice is slightly dry; day-old rice is perfect for this dish.


Tips for Perfect Rice Texture:

  • Spread the cooked rice on a baking sheet to cool it quickly and evenly.
  • Refrigerate the rice for a few hours to let it firm up.


Cooking the Chicken


Getting the chicken just right ensures it's tender and flavorful.


Cooking Methods for Tender Chicken:

  • Heat a tablespoon of vegetable oil in a pan over medium-high heat.
  • Add the marinated chicken and cook until it's no longer pink in the center, about 5-7 minutes.
  • Remove the chicken from the pan and set it aside.


Stir-Frying the Vegetables


Vegetables add color, nutrition, and crunch to your fried rice.


Selecting Vegetables:

  • Use a mix of peas, carrots, and corn for a classic combination.
  • Feel free to add bell peppers, broccoli, or any vegetables you prefer.


Cooking Techniques for Vegetables:

  • In the same pan, add another tablespoon of oil.
  • SautĆ© the onions and garlic until fragrant.
  • Add the mixed vegetables and cook until they are tender but still crisp.


Combining Ingredients


Now it's time to bring everything together.


Step-by-Step Process:

1. Scramble the Eggs: Push the vegetables to the side and pour the beaten eggs into the pan. Scramble until just set.

2. Add the Rice and Chicken: Mix in the cooked rice and chicken, breaking up any clumps.

3. Season: Pour in the soy sauce, oyster sauce, and sesame oil. Stir well to ensure everything is evenly coated.

4. Adjust Flavors: Taste and add salt, pepper, or additional soy sauce as needed.


Seasoning the Fried Rice


Seasoning is where you can make the dish truly your own.


Essential Seasonings:

Soy Sauce: Adds depth and saltiness.

Oyster Sauce: Provides a touch of sweetness and umami.

Sesame Oil: Gives a nutty flavor that enhances the overall taste.


Adjusting Flavors to Taste:

  • Start with the basic seasonings and adjust according to your preference.
  • Add a splash of fish sauce or a pinch of sugar if desired.


Serving Suggestions


Presentation matters, even for a humble dish like chicken fried rice.


Plating Ideas:

  • Serve the fried rice in a large bowl or plate it neatly in individual portions.
  • Garnish with sliced green onions and chopped cilantro for a fresh look.


Accompaniments:

  • Pair with a side of pickled vegetables or a simple green salad.
  • A bowl of hot soup can complement the meal perfectly.


Variations of Chicken Fried Rice


Fried rice is a versatile dish with many variations.


  • Thai Style: Add a bit of fish sauce and serve with lime wedges.
  • Indian Style: Use basmati rice and add some curry powder for a different flavor profile.
  • Korean Style: Include kimchi for a spicy and tangy twist.


Health Benefits of Chicken Fried Rice


Chicken fried rice can be nutritious and satisfying.


Nutritional Information:

  • Rich in protein from the chicken.
  • Packed with vitamins and minerals from the vegetables.
  • Carbohydrates from the rice provide energy.


Healthier Alternatives:

  • Use brown rice instead of white rice for added fiber.
  • Substitute chicken breast with tofu for a vegetarian option.
  • Reduce the amount of oil used or switch to a healthier oil like olive oil.


Common Mistakes to Avoid


Even experienced cooks can make mistakes.


  • Using Freshly Cooked Rice: Always use day-old rice for the best texture.
  • Overcrowding the Pan: Cook in batches if necessary to avoid steaming the ingredients.
  • Underseasoning: Taste as you go and adjust the seasoning to your preference.


Storage and Reheating Tips


Fried rice is great for meal prep and leftovers.


Best Practices for Leftovers:

Store in an airtight container in the refrigerator for up to 3 days.

Freeze portions for up to 3 months for a quick meal later.


Reheating Tips:

Reheat in a skillet over medium heat for the best texture.

Add a splash of water or broth to prevent the rice from drying out.


Frequently Asked Questions


1. Can I use other meats instead of chicken?

   Absolutely! Shrimp, beef, or pork can be excellent substitutes.

2. Is it necessary to use day-old rice?

   Yes, day-old rice has a firmer texture that fries better without becoming mushy.

3. How can I make my fried rice spicy?

   Add red pepper flakes, Sriracha, or diced fresh chili peppers for a kick.

4. Can I make fried rice without soy sauce?

   Yes, you can use alternatives like tamari or coconut aminos.

5. What type of oil is best for fried rice?

   Vegetable oil or sesame oil are commonly used, but you can experiment with other oils.


Conclusion

Chicken fried rice is a delightful dish that’s easy to make and customize. With the right ingredients and a few simple techniques, you can create a meal that’s both delicious and nutritious. Whether you stick to the classic recipe or explore different variations, this dish is sure to become a favorite in your household. So, gather your ingredients and give this recipe a try – you won’t be disappointed!

Wednesday 6 September 2023

Truffle Steak Melt

The Truffle Steak Melt is the epitome of indulgence—a combination of succulent steak, earthy truffle flavor, and melted cheese, all sandwiched between slices of toasted bread. This gourmet grilled delight is perfect for those moments when you want to treat yourself to something truly special.


Ingredients:

For the Steak:

  • 2 sirloin steaks (6-8 ounces each)
  • 2 tablespoons olive oil
  • Salt and black pepper, to taste
  • 2 cloves garlic, minced
  • 1 teaspoon fresh thyme leaves (or 1/2 teaspoon dried thyme)
  • For the Truffle Sauce:
  • 2 tablespoons truffle oil
  • 1/4 cup mayonnaise
  • 1 teaspoon Dijon mustard
  • 1 teaspoon lemon juice
  • Salt and black pepper, to taste

For the Sandwich:

  • 4 slices of your favorite bread (such as sourdough or ciabatta)
  • 4 slices of Swiss cheese
  • 4 slices of Provolone cheese
  • 1 cup baby spinach leaves
  • 2 tablespoons butter, softened


Instructions:

1. Prepare the Steak:

  • Preheat your grill or stovetop grill pan to high heat.
  • Rub the steaks with olive oil and season generously with salt, black pepper, minced garlic, and fresh thyme.

2. Grill the Steak:

  • Place the seasoned steaks on the hot grill and cook for about 3-4 minutes per side for medium-rare, adjusting the cooking time to your preferred level of doneness.
  • Remove the steaks from the grill and let them rest for a few minutes before slicing them thinly against the grain.

3. Make the Truffle Sauce:

In a small bowl, whisk together the truffle oil, mayonnaise, Dijon mustard, lemon juice, salt, and black pepper. Taste and adjust seasonings as needed. Set aside.

4. Assemble the Sandwich:

  • Lay out the four slices of bread on a clean surface.
  • Spread a generous amount of the truffle sauce on each slice of bread.
  • On two of the slices, layer the Swiss cheese, followed by the sliced steak, Provolone cheese, and baby spinach.
  • Top each sandwich with the remaining slices of bread, truffle sauce side down.
                                                             

5. Grill the Sandwich:

  • Heat a large skillet or griddle over medium-high heat and add the softened butter.
  • Carefully place the assembled sandwiches on the skillet or griddle and cook for about 2-3 minutes per side, or until the bread turns golden brown, and the cheese is melted and gooey.

6. Serve and Enjoy:

Remove the Truffle Steak Melts from the skillet, slice them in half if desired, and serve immediately while they're hot and gooey.

The Truffle Steak Melt is a luxurious treat that's sure to satisfy your cravings for rich, savory flavors. Whether you enjoy it as a decadent lunch or a gourmet dinner, this sandwich is a true delight for the senses. Enjoy every bite of this indulgent creation!


Conclusion:


The Truffle Steak Melt is a culinary masterpiece that brings together the finest ingredients to create a sandwich that's as indulgent as it is unforgettable. The succulent steak, enhanced by the earthy aroma of truffle oil and the creamy goodness of melted cheese, is a true delight for the taste buds.

This gourmet grilled sandwich is more than just a meal; it's an experience. Whether you savor it on a special occasion or when you simply crave something extraordinary, the Truffle Steak Melt never disappoints. It's a testament to the joys of combining high-quality ingredients and culinary creativity.


With its rich flavors and satisfying textures, the Truffle Steak Melt is a gourmet delight that leaves you with a taste of luxury. Share it with friends and loved ones or savor it as a treat to yourself—it's a sandwich that elevates any dining experience.

Frequently Asked Questions (FAQs):


1. Can I use a different cut of steak for the Truffle Steak Melt?
While sirloin steak is a popular choice for its tenderness and flavor, you can certainly use other cuts like ribeye or New York strip if you prefer. Just adjust the cooking time to achieve your desired level of doneness.

2. Is truffle oil necessary for the sauce, or can I use fresh truffles?
Truffle oil is a convenient way to infuse the sauce with truffle flavor, but if you have access to fresh truffles, you can use them to create a more decadent sauce. Simply shave or finely chop the fresh truffles and mix them into the mayonnaise for an authentic truffle experience.

3. What can I serve as a side dish with the Truffle Steak Melt?
The Truffle Steak Melt pairs well with a variety of sides, such as a crisp salad, sweet potato fries, or a simple vegetable medley. These sides complement the richness of the sandwich and provide a balanced meal.

4. Can I make the truffle sauce in advance?
Yes, you can prepare the truffle sauce ahead of time and refrigerate it in an airtight container. It will keep for several days, allowing you to have it ready whenever you're ready to make your Truffle Steak Melt.

5. What's the best way to reheat leftover Truffle Steak Melt?
To reheat a leftover Truffle Steak Melt, it's best to use an oven or toaster oven to maintain the crispiness of the bread and the gooeyness of the cheese. Preheat the oven to 350°F (175°C) and bake the sandwich for about 10-15 minutes, or until it's heated through and the bread is crispy again.

Cinnamon Sugar Apple Cake

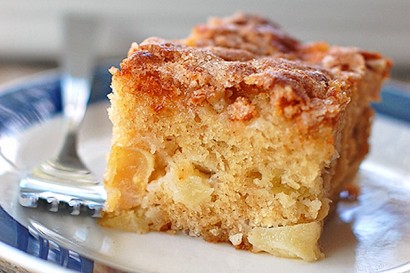
Cinnamon Sugar Apple Cake is the epitome of autumn comfort. This delightful cake combines the warm flavors of cinnamon and brown sugar with tender, sweet apples, creating a dessert that's perfect for cozy evenings and gatherings. Let's dive into making this mouthwatering treat.


Ingredients:

For the Cake:


  • 2 cups all-purpose flour
  • 1 1/2 teaspoons baking powder
  • 1/2 teaspoon baking soda
  • 1/2 teaspoon salt
  • 2 teaspoons ground cinnamon
  • 1/2 teaspoon ground nutmeg (optional)
  • 1/2 cup unsalted butter, softened
  • 1 cup granulated sugar
  • 2 large eggs
  • 1 teaspoon vanilla extract
  • 1 cup sour cream
  • 2 cups peeled, cored, and diced apples (such as Granny Smith or Honeycrisp)
  • For the Cinnamon Sugar Topping:
  • 1/4 cup granulated sugar
  • 1 teaspoon ground cinnamon

Instructions:


1. Preheat the Oven:

Preheat your oven to 350°F (175°C). Grease and flour a 9x9-inch (23x23 cm) square baking pan or a similar-sized cake pan.

2. Prepare the Dry Ingredients:

In a medium-sized bowl, whisk together the all-purpose flour, baking powder, baking soda, salt, ground cinnamon, and ground nutmeg (if using). Set this dry mixture aside.

3. Cream the Butter and Sugar:

In a separate large mixing bowl, beat the softened butter and granulated sugar together until the mixture becomes light and fluffy.

4. Add the Eggs and Vanilla:

Beat in the eggs one at a time, ensuring each is fully incorporated before adding the next. Then, mix in the vanilla extract.

5. Alternate Dry Ingredients and Sour Cream:

Gradually add the dry mixture to the wet mixture in three parts, alternating with the sour cream. Begin and end with the dry mixture, mixing until just combined after each addition.


6. Fold in the Apples:

Gently fold the diced apples into the cake batter. Be sure they are evenly distributed.

7. Prepare the Cinnamon Sugar Topping:

In a small bowl, combine the granulated sugar and ground cinnamon for the topping.

8. Assemble and Bake:

  • Pour half of the cake batter into the prepared baking pan, spreading it evenly.
  • Sprinkle half of the cinnamon sugar topping over the batter.
  • Add the remaining batter on top and smooth it out.
  • Finally, sprinkle the remaining cinnamon sugar topping evenly over the batter.

9. Bake and Cool:

  • Bake in the preheated oven for approximately 35-40 minutes, or until a toothpick inserted into the center comes out clean or with a few moist crumbs attached.
  • Remove the cake from the oven and allow it to cool in the pan for about 10-15 minutes.


10. Serve and Enjoy:

Slice and serve your Cinnamon Sugar Apple Cake warm or at room temperature. It's delicious on its own or with a dollop of whipped cream or a scoop of vanilla ice cream.

Cinnamon Sugar Apple Cake captures the essence of fall in every bite. The tender cake, loaded with sweet apple chunks and aromatic cinnamon, is a delightful treat that's perfect for dessert, brunch, or any time you crave a taste of autumn. Enjoy!


Conclusion:

Cinnamon Sugar Apple Cake is more than just a dessert; it's a warm, comforting embrace on a crisp fall day. This delectable cake combines the sweetness of apples, the warmth of cinnamon, and the richness of brown sugar to create a symphony of flavors that dance on your taste buds.

Baking this cake not only fills your kitchen with the inviting aroma of cinnamon and apples but also fills your heart with the joy of sharing a homemade treat with loved ones. It's a perfect addition to your autumn baking repertoire, whether you serve it as a cozy dessert after dinner or enjoy a slice with a cup of tea on a quiet afternoon.

With its moist, tender crumb and the sweet crunch of cinnamon sugar on top, Cinnamon Sugar Apple Cake embodies the essence of fall in every bite. So, gather your ingredients, preheat your oven, and let the flavors of the season come to life in this delightful dessert.

Frequently Asked Questions (FAQs):

1. Can I use other types of apples for this cake?
Absolutely! While Granny Smith and Honeycrisp apples are popular choices for their tartness and sweetness, you can use other apple varieties like Fuji, Gala, or Pink Lady, depending on your preference.

2. What is the best way to store leftover Cinnamon Sugar Apple Cake?
Store any leftover cake in an airtight container at room temperature for up to 2-3 days. If you want to keep it fresh for a longer period, refrigerate it for up to a week. Warm it in the oven or microwave before serving to restore its freshness.

3. Can I add nuts or raisins to the cake batter for extra texture and flavor?
Absolutely! Chopped nuts like walnuts or pecans and plump raisins can be wonderful additions to this cake. Simply fold them into the batter along with the diced apples.

4. Is it necessary to peel the apples before adding them to the cake?
While peeling the apples is a common practice for a smoother texture, leaving the peel on can add a rustic and slightly chewy texture to the cake. It's a matter of personal preference; either way, the cake will be delicious.

5. Can I make this cake in advance and freeze it for later?
Yes, you can! Once the cake has cooled completely, wrap it tightly in plastic wrap and then in aluminum foil. Label it with the date and freeze it for up to three months. Thaw it in the refrigerator and bring it to room temperature before serving